前一阵子学习了一些简单的APP逆向分析技术,以及使用Frida进行对关键逻辑挂钩子修改获取一些数值,现在针对学习过的东西做一下实践,尝试破解一下MAS Crackmes - OWASP Mobile Application Security 。
Android UnCrackable L1 分析逻辑 模拟器安装app:
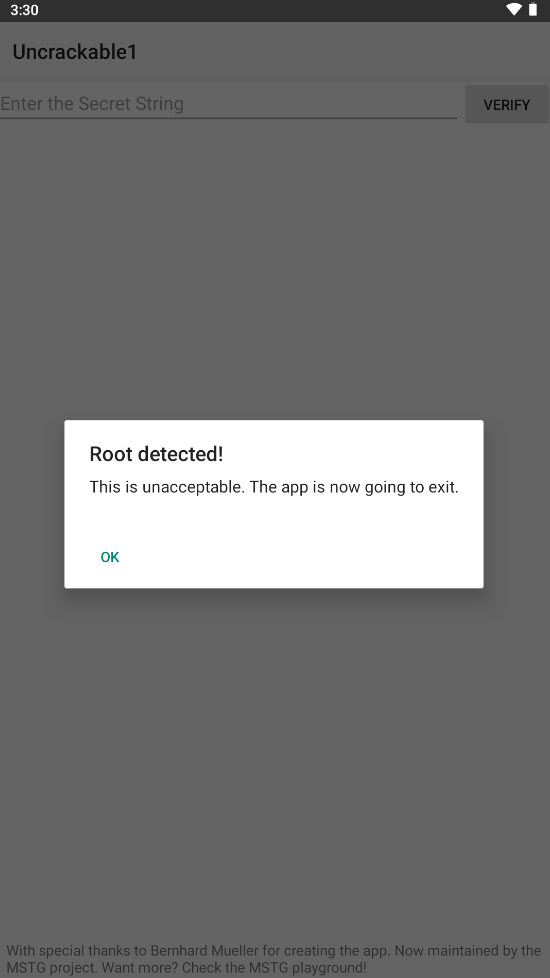
提示检测到了root环境,点击ok就会自动退出。
jadx一键分析,可以得到如下代码:
sg.vantagepoint.uncrackable1.MainActivity: 1 2 3 4 5 6 7 8 9 10 11 12 13 14 15 16 17 18 19 20 21 22 23 24 25 26 27 28 29 30 31 32 33 34 35 36 37 38 39 40 41 42 43 44 45 46 47 48 49 50 51 52 53 54 55 56 57 58 59 60 61 package sg.vantagepoint.uncrackable1;import android.app.Activity;import android.app.AlertDialog;import android.content.DialogInterface;import android.os.Bundle;import android.view.View;import android.widget.EditText;import owasp.mstg.uncrackable1.R;import sg.vantagepoint.a.b;import sg.vantagepoint.a.c;public class MainActivity extends Activity {private void a (String str) {AlertDialog create = new AlertDialog .Builder(this ).create();"This is unacceptable. The app is now going to exit." );3 , "OK" , new DialogInterface .OnClickListener() { @Override public void onClick (DialogInterface dialogInterface, int i) {0 );false );@Override protected void onCreate (Bundle bundle) {if (c.a() || c.b() || c.c()) {"Root detected!" );if (b.a(getApplicationContext())) {"App is debuggable!" );super .onCreate(bundle);public void verify (View view) {String obj = ((EditText) findViewById(R.id.edit_text)).getText().toString();AlertDialog create = new AlertDialog .Builder(this ).create();if (a.a(obj)) {"Success!" );"This is the correct secret." ;else {"Nope..." );"That's not it. Try again." ;3 , "OK" , new DialogInterface .OnClickListener() { @Override public void onClick (DialogInterface dialogInterface, int i) {
这是APP的主逻辑,首先对设备root状态进行检测,如果c.a()、c.b()、c.c()任意一个返回true就认定为设备已经被root就会退出,然后有一个verify方法调用了a.a(obj),如果a.a(obj)返回true就认为secret正确,那么本次分析的主逻辑就是先去除root检测,然后再找到secret即可。
sg.vantagepoint.uncrackable1.a: 1 2 3 4 5 6 7 8 9 10 11 12 13 14 15 16 17 18 19 20 21 22 23 24 25 26 27 28 package sg.vantagepoint.uncrackable1;import android.util.Base64;import android.util.Log;public class a {public static boolean a (String str) {byte [] bArr;byte [] bArr2 = new byte [0 ];try {"8d127684cbc37c17616d806cf50473cc" ), Base64.decode("5UJiFctbmgbDoLXmpL12mkno8HT4Lv8dlat8FxR2GOc=" , 0 ));catch (Exception e) {"CodeCheck" , "AES error:" + e.getMessage());return str.equals(new String (bArr));public static byte [] b(String str) {int length = str.length();byte [] bArr = new byte [length / 2 ];for (int i = 0 ; i < length; i += 2 ) {2 ] = (byte ) ((Character.digit(str.charAt(i), 16 ) << 4 ) + Character.digit(str.charAt(i + 1 ), 16 ));return bArr;
这段代码是判断输入的信息与原始AES加密的信息是否一致的方法,到智利其实已经给出了密文和密钥,直接去破译secret应该也可以,不过我们既然是实践frida就继续分析下去吧。
sg.vantagepoint.a.a: 1 2 3 4 5 6 7 8 9 10 11 12 13 14 package sg.vantagepoint.a;import javax.crypto.Cipher;import javax.crypto.spec.SecretKeySpec;public class a {public static byte [] a(byte [] bArr, byte [] bArr2) {SecretKeySpec secretKeySpec = new SecretKeySpec (bArr, "AES/ECB/PKCS7Padding" );Cipher cipher = Cipher.getInstance("AES" );2 , secretKeySpec);return cipher.doFinal(bArr2);
这个就是上面sg.vantagepoint.uncrackable1.a中调用的解密的方法。
sg.vantagepoint.a.b: 1 2 3 4 5 6 7 8 9 10 package sg.vantagepoint.a;import android.content.Context;public class b {public static boolean a (Context context) {return (context.getApplicationContext().getApplicationInfo().flags & 2 ) != 0 ;
主逻辑里面调用用来判断是否处于调试状态的代码
sg.vantagepoint.a.c: 1 2 3 4 5 6 7 8 9 10 11 12 13 14 15 16 17 18 19 20 21 22 23 24 25 26 27 28 29 30 package sg.vantagepoint.a;import android.os.Build;import java.io.File;public class c {public static boolean a () {for (String str : System.getenv("PATH" ).split(":" )) {if (new File (str, "su" ).exists()) {return true ;return false ;public static boolean b () {String str = Build.TAGS;return str != null && str.contains("test-keys" );public static boolean c () {for (String str : new String []{"/system/app/Superuser.apk" , "/system/xbin/daemonsu" , "/system/etc/init.d/99SuperSUDaemon" , "/system/bin/.ext/.su" , "/system/etc/.has_su_daemon" , "/system/etc/.installed_su_daemon" , "/dev/com.koushikdutta.superuser.daemon/" }) {if (new File (str).exists()) {return true ;return false ;
上面提到的用于判断是否Root的代码。
Frida挂钩子 绕过Root检测 根据上面的分析,我们只需要将三个检测root特征的函数全部返回false即可,因此我们就可以编写如下frida脚本:
1 2 3 4 5 6 7 8 9 10 11 12 Java .perform (function (var func = Java .use ('sg.vantagepoint.a.c' );a .implementation = function (return false ;b .implementation = function (return false ;c .implementation = function (return false ;
运行脚本:
1 frida -U -f owasp.mstg.uncrackable1 -l frida_script.js
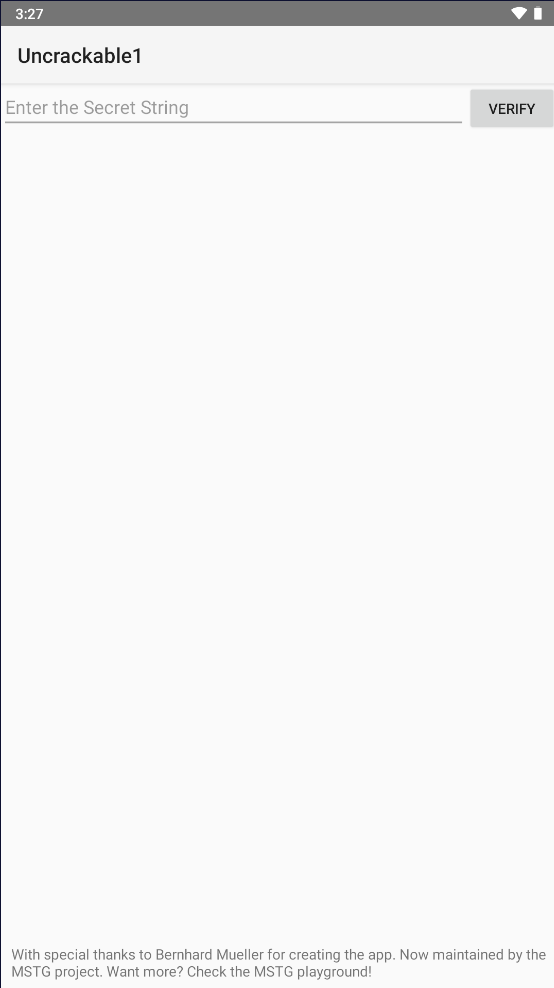
我们可以看到原本检测到了root的界面就消失了,不会自动退出。
获取secret 根据上面的分析,我们只需要在调用sg.vantagepoint.a.a.a方法的时候勾取返回值输出即可,因此可以继续完善我们的最终脚本如下:
1 2 3 4 5 6 7 8 9 10 11 12 13 14 15 16 17 18 19 20 21 22 Java .perform (function (var func = Java .use ('sg.vantagepoint.a.c' );a .implementation = function (return false ;b .implementation = function (return false ;c .implementation = function (return false ;var func2 = Java .use ('sg.vantagepoint.a.a' );a .implementation = function (str1, str2 ) {var res = this .a (str1, str2);console .log (res);return res;
执行脚本后,随意输入字符点击VERIFY
虽然是错误的,但是我们可以在控制台看到正确的字节序列
最终的执行结果打印出的数据如下:
[SM-N976N::owasp.mstg.uncrackable1 ]-> 73,32,119,97,110,116,32,116,111,32,98,101,108,105,101,118,101
我们使用python将字节数组转换一下:
1 2 >>> print (bytes ([73 ,32 ,119 ,97 ,110 ,116 ,32 ,116 ,111 ,32 ,98 ,101 ,108 ,105 ,101 ,118 ,101 ]).decode())
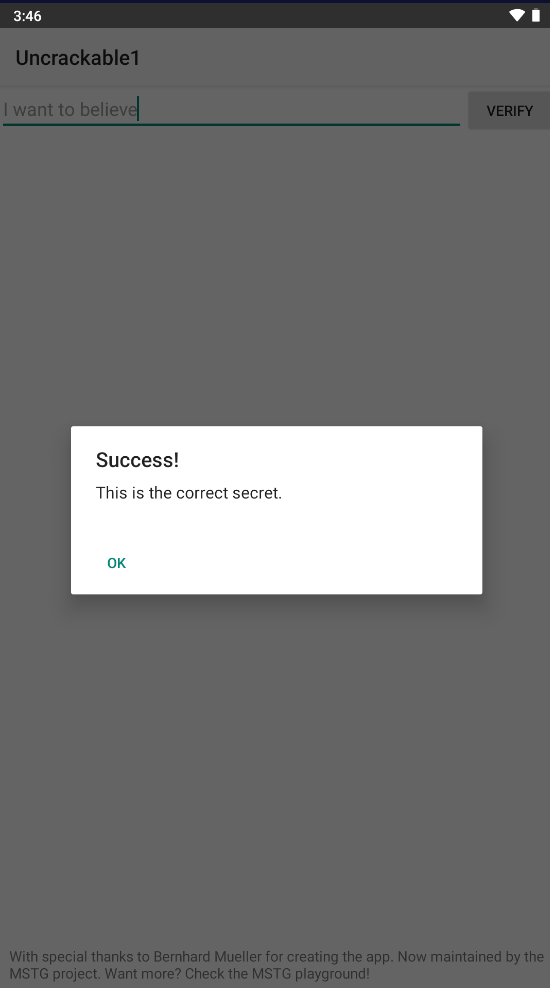
最终结果就是I want to believe:
Android UnCrackable L2 分析逻辑 Root检测和调试检测与L1中相同,这里就不再冗余分析了。
MainActivity 1 2 3 4 5 6 7 8 9 10 11 12 13 14 15 16 17 18 19 20 21 22 23 24 25 26 27 28 29 30 31 32 33 34 35 36 37 38 39 40 41 42 43 44 45 46 47 48 49 50 51 52 53 54 55 56 57 58 59 60 61 62 63 64 65 66 67 68 69 70 71 72 73 74 75 76 77 78 79 80 81 82 83 84 85 86 87 88 89 90 91 92 93 94 95 package sg.vantagepoint .uncrackable2 ;import android.app .AlertDialog ;import android.content .DialogInterface ;import android.os .AsyncTask ;import android.os .Bundle ;import android.os .Debug ;import android.os .SystemClock ;import android.support .v7 .app .c ;import android.view .View ;import android.widget .EditText ;import owasp.mstg .uncrackable2 .R ;import sg.vantagepoint .a .a ;import sg.vantagepoint .a .b ;public class MainActivity extends c {private CodeCheck m;static {System .loadLibrary ("foo" );public void a (String strAlertDialog create = new AlertDialog .Builder (this ).create ();setTitle (str);setMessage ("This is unacceptable. The app is now going to exit." );setButton (-3 , "OK" , new DialogInterface .OnClickListener () { @Override public void onClick (DialogInterface dialogInterface, int i ) {System .exit (0 );setCancelable (false );show ();private native void init ();@Override public void onCreate (Bundle bundle ) {init ();if (b.a () || b.b () || b.c ()) {a ("Root detected!" );if (a.a (getApplicationContext ())) {a ("App is debuggable!" );new AsyncTask <Void , String , String >() { @Override public String doInBackground (Void... voidArr ) {while (!Debug .isDebuggerConnected ()) {SystemClock .sleep (100L);return null ;@Override public void onPostExecute (String strMainActivity .this .a ("Debugger detected!" );execute (null , null , null );this .m = new CodeCheck ();super .onCreate (bundle);setContentView (R.layout .activity_main );public void verify (View view ) {String str;String obj = ((EditText ) findViewById (R.id .edit_text )).getText ().toString ();AlertDialog create = new AlertDialog .Builder (this ).create ();if (this .m .a (obj)) {setTitle ("Success!" );"This is the correct secret." ;else {setTitle ("Nope..." );"That's not it. Try again." ;setMessage (str);setButton (-3 , "OK" , new DialogInterface .OnClickListener () { @Override public void onClick (DialogInterface dialogInterface, int i ) {dismiss ();show ();
主逻辑跟L1的类似,只是verify的方法中判断逻辑改为了CodeCheck的a方法。
CodeCheck 1 2 3 4 5 6 7 8 9 10 package sg.vantagepoint .uncrackable2 ;public class CodeCheck {private native boolean bar (byte [] bArr);public boolean a (String str ) {return bar (str .getBytes ());
这个类中的a方法调用了一个native方法bar,将输入提交的字符串给so文件中的方法去处理,如果native方法返回true就会显示输入了正确的secret。
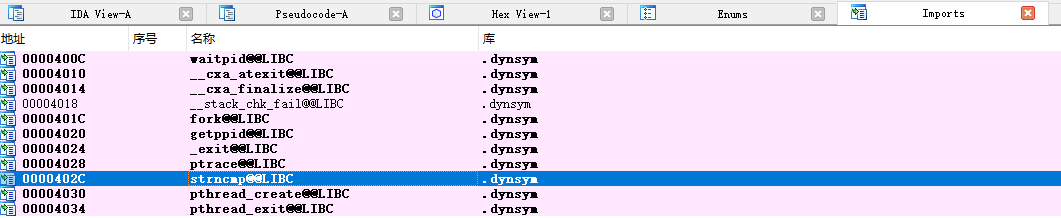
libfoo.so 导出表中有下面两个函数,可以看出该JNI调用符合静态注册的特征,Java_sg_vantagepoint_uncrackable2_CodeCheck_bar函数就是CodeCheck中的native bar方法。这里其实看ida逆向之后的逻辑就可以知道secret就是Thanks for all the fish。
1 2 3 4 5 6 7 8 9 10 11 12 13 14 15 16 17 18 19 20 21 22 23 24 25 26 27 28 29 int Java_sg_vantagepoint_uncrackable2_MainActivity_init () int result; 1 ;return result;Java_sg_vantagepoint_uncrackable2_CodeCheck_bar (int a1, int a2, int a3) const char *v3; char s2[24 ]; unsigned int v6; 0x14 u);0 ;if ( byte_4008 == 1 )strcpy (s2, "Thanks for all the fish" );const char *)(*(int (__cdecl **)(int , int , _DWORD))(*(_DWORD *)a1 + 736 ))(a1, a3, 0 );if ( (*(int (__cdecl **)(int , int ))(*(_DWORD *)a1 + 684 ))(a1, a3) == 23 && !strncmp (v3, s2, 0x17 u) )return 1 ;return result;
导入表
其实这里已经得到了secret的信息,后面我们可以尝试hook native层的导入函数尝试获取这个secret并且让bar函数一直返回true
Frida脚本 勾取bar函数一直返回true 绕过root检测逻辑与L1一致,setTimeout是想等加载完成再hook libfoo.so,或许有更优雅的方法暂时还没想到。然后就寻找导出函数地址进行attach,在函数返回时进行返回值替换即可。
1 2 3 4 5 6 7 8 9 10 11 12 13 14 15 16 17 18 19 20 21 22 23 24 25 26 27 Java .perform (function (var func = Java .use ('sg.vantagepoint.a.b' );a .implementation = function (return false ;b .implementation = function (return false ;c .implementation = function (return false ;setTimeout (function x (var func_addr = Module .findExportByName ("libfoo.so" ,"Java_sg_vantagepoint_uncrackable2_CodeCheck_bar" );console .log (func_addr);Interceptor .attach (func_addr, {onEnter : function (args ) {console .log ("Hook start" );console .log ("args[2]=" + args[2 ]); onLeave : function (retval ){ console .log ("return original value:" +retval); replace (1 );1000 );
执行下面的命令:
1 frida -U -f owasp.mstg.uncrackable2 -l frida_script.js
然后在页面任意输入一个值:
得到下面的输出:
1 2 3 4 [SM-N976N::owasp.mstg.uncrackable2 ]-> 0x71fe24863110return original value:0x0
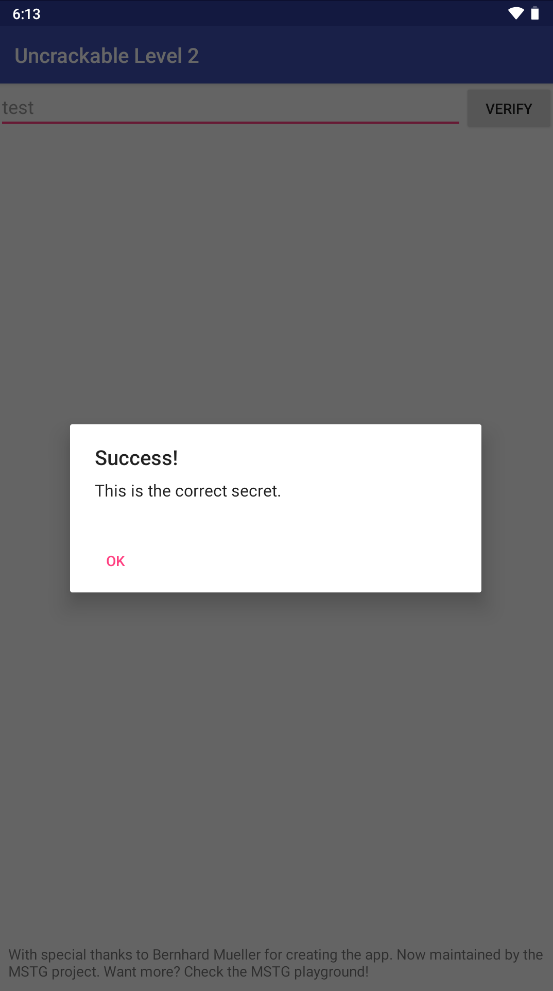
已经成功勾取并修改了返回值,APP输入任意字符都可以显示成功。
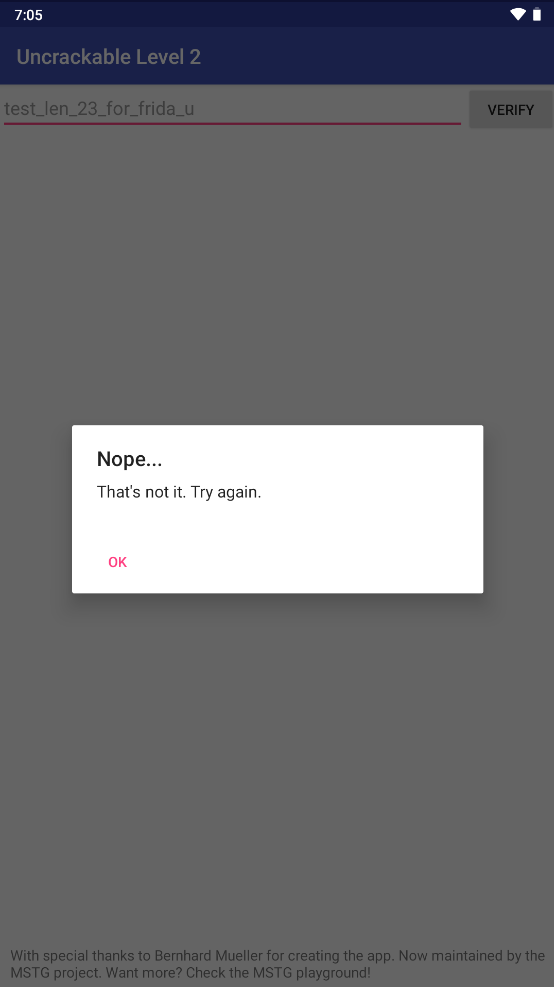
勾取secret 我们遍历libfoo的导入表,找到strncmp的调用,随后attach到strncmp。在上面的伪代码中可以看到,!strncmp(v3, s2, 0x17u)在调用时会传入数据长度0x17,也就是十进制数23,因此我们筛选出调用参数长度为23的strncmp即可,因此加了if去确定,随后”test_len_23_for_frida_u”时一段长度为23的随意的字符串,目的是为了继续做筛选,根据我们填入的字符串值去反向推导。
1 2 3 4 5 6 7 8 9 10 11 12 13 14 15 16 17 18 19 20 21 22 23 24 25 26 27 28 29 30 31 32 33 Java .perform (function (var func = Java .use ('sg.vantagepoint.a.b' );a .implementation = function (return false ;b .implementation = function (return false ;c .implementation = function (return false ;setTimeout (function x (var strncmp = undefined ;var imports = Module .enumerateImportsSync ("libfoo.so" );for ( var i = 0 ; i < imports.length ; i++) {if (imports[i].name == "strncmp" ) {address ;break ;console .log (strncmp);Interceptor .attach (strncmp, {onEnter : function (args ) {if (args[2 ].toInt32 () == 23 && Memory .readUtf8String (args[0 ],23 ) == "test_len_23_for_frida_u" ){console .log ("[*] Secret string at " + args[1 ] + ": " + Memory .readUtf8String (args[1 ],23 ));1000 );
运行frida -U -f owasp.mstg.uncrackable2 -l frida_script.js
然后再输入test_len_23_for_frida_u点击verify即可
随后就可以在控制台看到secret字符串。
1 2 [SM-N976N::owasp.mstg.uncrackable2 ]-> 0x71feb22a5270for all the fish
Android UnCrackable L3 分析逻辑 MainActivity 1 2 3 4 5 6 7 8 9 10 11 12 13 14 15 16 17 18 19 20 21 22 23 24 25 26 27 28 29 30 31 32 33 34 35 36 37 38 39 40 41 42 43 44 45 46 47 48 49 50 51 52 53 54 55 56 57 58 59 60 61 62 63 64 65 66 67 68 69 70 71 72 73 74 75 76 77 78 79 80 81 82 83 84 85 86 87 88 89 90 91 92 93 94 95 96 97 98 99 100 101 102 103 104 105 106 107 108 109 110 111 112 113 114 115 116 117 118 119 120 121 122 123 124 125 126 127 128 129 130 package sg.vantagepoint.uncrackable3;import android.app.AlertDialog;import android.content.DialogInterface;import android.os.AsyncTask;import android.os.Bundle;import android.os.Debug;import android.os.SystemClock;import android.support.v7.app.AppCompatActivity;import android.util.Log;import android.view.View;import android.widget.EditText;import java.io.IOException;import java.util.HashMap;import java.util.Map;import java.util.zip.ZipEntry;import java.util.zip.ZipFile;import sg.vantagepoint.util.IntegrityCheck;import sg.vantagepoint.util.RootDetection;public class MainActivity extends AppCompatActivity {private static final String TAG = "UnCrackable3" ;static int tampered = 0 ;private static final String xorkey = "pizzapizzapizzapizzapizz" ;private CodeCheck check;private native long baz () ;private native void init (byte [] bArr) ;public void showDialog (String str) {AlertDialog create = new AlertDialog .Builder(this ).create();"This is unacceptable. The app is now going to exit." );3 , "OK" , new DialogInterface .OnClickListener() { @Override public void onClick (DialogInterface dialogInterface, int i) {0 );false );private void verifyLibs () {this .crc = new HashMap ();this .crc.put("armeabi-v7a" , Long.valueOf(Long.parseLong(getResources().getString(owasp.mstg.uncrackable3.R.string.armeabi_v7a))));this .crc.put("arm64-v8a" , Long.valueOf(Long.parseLong(getResources().getString(owasp.mstg.uncrackable3.R.string.arm64_v8a))));this .crc.put("x86" , Long.valueOf(Long.parseLong(getResources().getString(owasp.mstg.uncrackable3.R.string.x86))));this .crc.put("x86_64" , Long.valueOf(Long.parseLong(getResources().getString(owasp.mstg.uncrackable3.R.string.x86_64))));try {ZipFile zipFile = new ZipFile (getPackageCodePath());for (Map.Entry<String, Long> entry : this .crc.entrySet()) {String str = "lib/" + entry.getKey() + "/libfoo.so" ;ZipEntry entry2 = zipFile.getEntry(str);"CRC[" + str + "] = " + entry2.getCrc());if (entry2.getCrc() != entry.getValue().longValue()) {31337 ;": Invalid checksum = " + entry2.getCrc() + ", supposed to be " + entry.getValue());ZipEntry entry3 = zipFile.getEntry("classes.dex" );"CRC[classes.dex] = " + entry3.getCrc());if (entry3.getCrc() != baz()) {31337 ;"classes.dex: crc = " + entry3.getCrc() + ", supposed to be " + baz());catch (IOException unused) {"Exception" );0 );@Override public void onCreate (Bundle bundle) {new AsyncTask <Void, String, String>() { @Override public String doInBackground (Void... voidArr) {while (!Debug.isDebuggerConnected()) {100L );return null ;@Override public void onPostExecute (String str) {this .showDialog("Debugger detected!" );0 );null , null , null );if (RootDetection.checkRoot1() || RootDetection.checkRoot2() || RootDetection.checkRoot3() || IntegrityCheck.isDebuggable(getApplicationContext()) || tampered != 0 ) {"Rooting or tampering detected." );this .check = new CodeCheck ();super .onCreate(bundle);public void verify (View view) {String obj = ((EditText) findViewById(owasp.mstg.uncrackable3.R.id.edit_text)).getText().toString();AlertDialog create = new AlertDialog .Builder(this ).create();if (this .check.check_code(obj)) {"Success!" );"This is the correct secret." );else {"Nope..." );"That's not it. Try again." );3 , "OK" , new DialogInterface .OnClickListener() { @Override public void onClick (DialogInterface dialogInterface, int i) {static {"foo" );
首先检查各种版本的so,使用crc校验,随后将xorkey传入本地init方法进行初始化,然后创建异步任务检测是否处于debug状态,然后检测是否root。
verify方法主要逻辑是调用check_code方法去验证输入的secret是否正确。
CodeCheck 1 2 3 4 5 6 7 8 9 10 11 12 package sg.vantagepoint.uncrackable3;public class CodeCheck {private static final String TAG = "CodeCheck" ;private native boolean bar (byte [] bArr) ;public boolean check_code (String str) {return bar(str.getBytes());
校验secret的逻辑,调用了本地的bar方法,bar方法的IDA反汇编逻辑如下(32位):
1 2 3 4 5 6 7 8 9 10 11 12 13 14 15 16 17 18 19 20 21 22 23 24 25 26 27 28 29 30 31 32 33 34 35 36 37 38 39 40 char __cdecl Java_sg_vantagepoint_uncrackable3_CodeCheck_bar (int a1, int a2, int a3) int v4; unsigned int v5; int *i; bool v7; char result; int v10; int v11; char v12; unsigned int v13; 0x14 u);0LL ;0 ;0 ;0 ;if ( dword_6038 == 2 )int )&v9);int (__cdecl **)(int , int , _DWORD))(*(_DWORD *)a1 + 736 ))(a1, a3, 0 );if ( (*(int (__cdecl **)(int , int ))(*(_DWORD *)a1 + 684 ))(a1, a3) == 24 )0 ;for ( i = &dword_601C; *(_BYTE *)(v4 + v5) == (*((_BYTE *)&v9 + v5) ^ *(_BYTE *)i); i = (int *)((char *)i + 1 ) )24 ;if ( v5 >= 0x18 )1 ;if ( v7 )return result;return 0 ;return 0 ;
后面我们着重对上述反汇编代码进行分析。
首先校验dword_6038的值是不是2,如果不是2证明初始化过程存在绕过或者错误,init函数以及验证环境中是否存在frida或者xposed关键字的子线程中都存在++dword_6038:
1 2 3 4 5 6 7 8 9 10 11 12 13 14 15 16 17 18 19 20 21 22 23 24 25 26 27 28 29 30 31 32 33 34 35 36 37 38 39 40 41 42 43 44 45 46 47 48 49 50 51 52 53 54 55 56 57 58 59 60 61 void __noreturn sub_3080 () const char *v1; char s[528 ]; "/proc/self/maps" , "r" );if ( v0 )do while ( !fgets(s, 512 , v0) )0x1F4 u);"/proc/self/maps" , "r" );if ( !v0 )goto LABEL_7;while ( !strstr (s, "frida" ) && !strstr (s, "xposed" ) );"Tampering detected! Terminating..." ;else "Error opening /proc/self/maps! Terminating..." ;2 , "UnCrackable3" , v1);unsigned int sub_3180 () int newthread[6 ]; 1 ] = __readgsdword(0x14 u);pthread_t *)newthread, 0 , (void *(*)(void *))sub_3080, 0 ); 0 ;0 ;0 ;0 ;0 ;0 ;0 ;return __readgsdword(0x14 u);int __cdecl Java_sg_vantagepoint_uncrackable3_MainActivity_init (int a1, int a2, int a3) const char *v4; int result; const char *)(*(int (__cdecl **)(int , int , _DWORD))(*(_DWORD *)a1 + 736 ))(a1, a3, 0 );strncpy ((char *)&dword_601C, v4, 0x18 u);int (__cdecl **)(int , int , const char *, int ))(*(_DWORD *)a1 + 768 ))(a1, a3, v4, 2 );return result;
随后调用sub_FA0对另一个异或的key进行初始化,我们进入这个函数发现有两千多行的伪代码,实际对入参操作的只有最后一段:
1 2 3 4 5 6 7 8 9 10 11 12 13 14 15 16 17 18 19 _DWORD *__cdecl sub_FA0 (int a1) if ( result )4 ) = 0 ;0 ;12 ) = 0 ;8 ) = 0 ;24 ) = 0 ;16 ) = 0x005A0E08 ;20 ) = 0x14130817 ;return result;
后面初始化一下用户输入的值a3的字符串长度是否为24,不是24直接返回(secret的长度为24)。
后面进入了最重要的逻辑,一个for循环:for ( i = &dword_601C; *(_BYTE *)(v4 + v5) == (*((_BYTE *)&v9 + v5) ^ *(_BYTE *)i); i = (int *)((char *)i + 1) )
初始化的时候调用了strncpy((char *)&dword_601C, v4, 0x18u);因此合理推测,dword_601C中存储的是xorkey也就是”pizzapizzapizzapizzapizz”;异或操作的另一个值v9就是sub_FA0中初始化的a1的值。
其实到这里我们已经知道了大概的逻辑,将用户的输入与”pizzapizzapizzapizzapizz”和v9的异或结果比较(其中v9的前16个8bit组为0x15131D5A1903000D1549170F1311081D,紧接着4个8bit组为0x005A0E08,最后4个0x14130817,由于x86架构下数据存储为小端序,即低地址为低位,那么v9的值就是1D 08 11 13 0F 17 49 15 0D 00 03 19 5A 1D 13 15 08 0E 5A 00 17 08 13 14),如果24个值比较完成都一致就返回1表示校验成功,否则返回0表示secret错误。两个异或的key我们都得到了,便可以直接静态分析出结果:
1 2 3 4 otherkey = bytes .fromhex("1D 08 11 13 0F 17 49 15 0D 00 03 19 5A 1D 13 15 08 0E 5A 00 17 08 13 14" )b'pizzapizzapizzapizzapizz' bytes (a ^ b for (a, b) in zip (pizza, otherkey))print (secret)
结果为:b'making owasp great again'
IntegrityCheck 1 2 3 4 5 6 7 8 9 10 package sg.vantagepoint.util;import android.content.Context;public class IntegrityCheck {public static boolean isDebuggable (Context context) {return (context.getApplicationContext().getApplicationInfo().flags & 2 ) != 0 ;
跟前面一样,检测是否为debug模式
RootDetection 1 2 3 4 5 6 7 8 9 10 11 12 13 14 15 16 17 18 19 20 21 22 23 24 25 26 27 28 29 30 package sg.vantagepoint.util;import android.os.Build;import java.io.File;public class RootDetection {public static boolean checkRoot1 () {for (String str : System.getenv("PATH" ).split(":" )) {if (new File (str, "su" ).exists()) {return true ;return false ;public static boolean checkRoot2 () {String str = Build.TAGS;return str != null && str.contains("test-keys" );public static boolean checkRoot3 () {for (String str : new String []{"/system/app/Superuser.apk" , "/system/xbin/daemonsu" , "/system/etc/init.d/99SuperSUDaemon" , "/system/bin/.ext/.su" , "/system/etc/.has_su_daemon" , "/system/etc/.installed_su_daemon" , "/dev/com.koushikdutta.superuser.daemon/" }) {if (new File (str).exists()) {return true ;return false ;
root探测与前两个一样,只是名字稍微变了一下,依然可以采用hook检测函数替换返回值的方法进行绕过。
Frida脚本 绕过root检测 与之前的一样,修改返回值:
1 2 3 4 5 6 7 8 9 10 11 12 Java .perform (function (var func = Java .use ('sg.vantagepoint.util.RootDetection' );checkRoot1 .implementation = function (return false ;checkRoot2 .implementation = function (return false ;checkRoot3 .implementation = function (return false ;
绕过maps中frida关键字的检测 如果我们直接尝试绕过root检测就会发现frida会报错:
1 2 3 4 5 6 7 8 9 10 11 12 13 14 15 16 17 18 19 20 21 Process crashed: Trace/BPT trap 'samsung/d2que/d2q:9/QP1A.190711.020/900211026:user/release-keys' '0' 'x86_64' signal 6 (SIGABRT), code -6 (SI_TKILL), fault addr -------- rax 0000000000000000 rbx 0000709cb2a17280 rcx 0000709d4c4409f7 rdx 0000000000000006 r8 0000000000000031 r9 0000000000000031 r10 0000000000000000 r11 0000000000000202 r12 0000709cb2a1bb62 r13 0000709cb2a1bb68 r14 0000709cb2a1bb50 r15 0000709cb2a1bb60 rdi 0000000000001292 rsi 00000000000012ae rbp 0000709ccbc14018 rsp 0000709cb2a17268 rip 0000709d4c4409f7 backtrace: #00 pc 00000000000809f7 /system/lib64/libc.so (offset 0x80000) (tgkill+7) #01 pc 000000000000374a /data/app/owasp.mstg.uncrackable3-t4sbiQd8Jfn7fu2UNT3j1g==/lib/x86_64/libfoo.so (goodbye()+10) #02 pc 000000000000389a /data/app/owasp.mstg.uncrackable3-t4sbiQd8Jfn7fu2UNT3j1g==/lib/x86_64/libfoo.so #03 pc 0000000000093dcb /system/lib64/libc.so (offset 0x80000) (__pthread_start(void*)+27) #04 pc 000000000002c0dd /system/lib64/libc.so (offset 0x2c000) (__start_thread+61)
调用了goodbye直接结束了
于是重新回到静态代码的分析,frida的检测逻辑如下:
1 2 3 4 5 6 7 8 9 10 11 12 13 14 15 16 17 18 19 20 21 22 23 24 25 26 27 28 29 30 31 void __noreturn sub_3080 () const char *v1; char s[528 ]; "/proc/self/maps" , "r" );if ( v0 )do while ( !fgets(s, 512 , v0) )0x1F4 u);"/proc/self/maps" , "r" );if ( !v0 )goto LABEL_7;while ( !strstr (s, "frida" ) && !strstr (s, "xposed" ) );"Tampering detected! Terminating..." ;else "Error opening /proc/self/maps! Terminating..." ;2 , "UnCrackable3" , v1);
绕过frida检测方法1 我们可以看到直接使用libc的标准库函数strstr检测maps中是否有frida和xposed的关键字,那么我们就可以hook底层的strstr函数,当期望判断是否含有frida时直接返回没有即可,参考Frida CodeShare :
1 2 3 4 5 6 7 8 9 10 11 12 13 14 15 16 17 18 19 20 21 var haystack = "" ;"" ;false ;Interceptor .Module .ExportByName("libc.so" , "strstr" ) , {function (args) {[0 ] ;[1 ] ;Boolean(0) ;Memory .Utf8String(haystack ) ;Memory .Utf8String(needle ) ;if (haystack.indexOf("frida" ) !== -1 || haystack.indexOf("xposed" ) !== -1 ) {Boolean(1) ;function (retval) {if (frida) {0 );
绕过frida检测方法2 参考Android OWASP crackmes: Write-up UnCrackable Level 3 - Computer Issues (enovella.github.io) 的方法,绕过frida检测还可以不创建检测线程(太妙了)。由于检测frida的线程和反调试线程是通过pthread创建的,并且调用过程中特征为参数1和参数3都是0(pthread_create(&v2, 0, (void *(*)(void *))sub_3220, 0);,pthread_create((pthread_t *)newthread, 0, (void *(*)(void *))sub_3080, 0);),我们可以hook线程创建函数,检测到第一个参数和第三个参数为0时调用一个始终返回0的线程:
从libc函数pthread_create中获取本地指针。
用这个指针创建一个本地函数。
定义一个本地回调并重载此方法。
使用带有replace模式的Interceptor注入替换。
如果我们检测到pthread_create想要产生检测frida或者调试的线程,那么我们将执行回调,并且总是返回0,模拟Frida不在进程的地址空间中。
1 2 3 4 5 6 7 8 9 10 11 12 13 14 15 16 17 18 var p_pthread_create = Module .findExportByName ("libc.so" , "pthread_create" );var pthread_create = new NativeFunction ( p_pthread_create, "int" , ["pointer" , "pointer" , "pointer" , "pointer" ]);send ("NativeFunction pthread_create() replaced @ " + pthread_create);Interceptor .replace ( p_pthread_create, new NativeCallback (function (ptr0, ptr1, ptr2, ptr3 ) {send ("pthread_create() overloaded" );var ret = ptr (0 );if (ptr1.isNull () && ptr3.isNull ()) {send ("loading fake pthread_create because ptr1 and ptr3 are equal to 0!" );else {send ("loading real pthread_create()" );pthread_create (ptr0,ptr1,ptr2,ptr3);send ("ret: " + ret);"int" , ["pointer" , "pointer" , "pointer" , "pointer" ]));
运行frida绕过和root检测绕过脚本就可以进入输入secret页面:
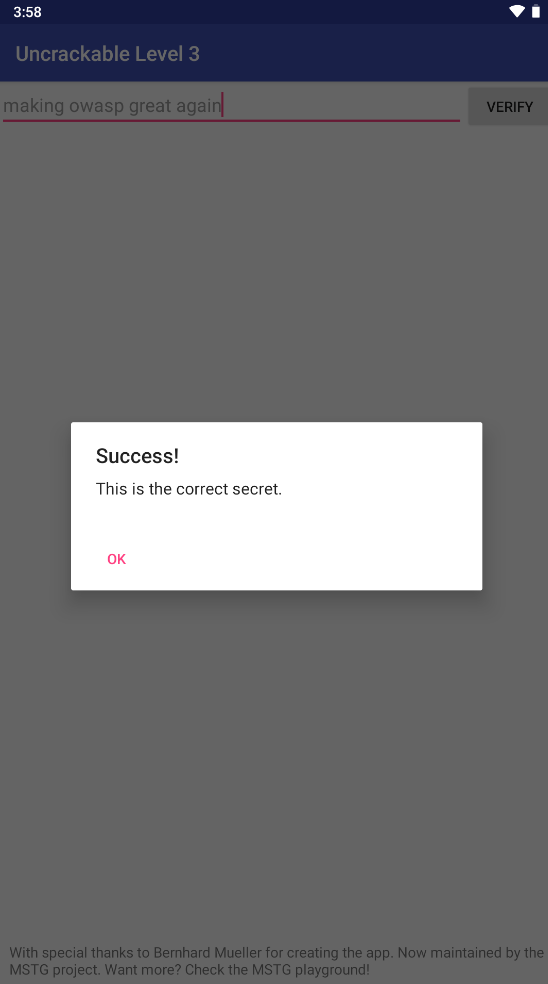
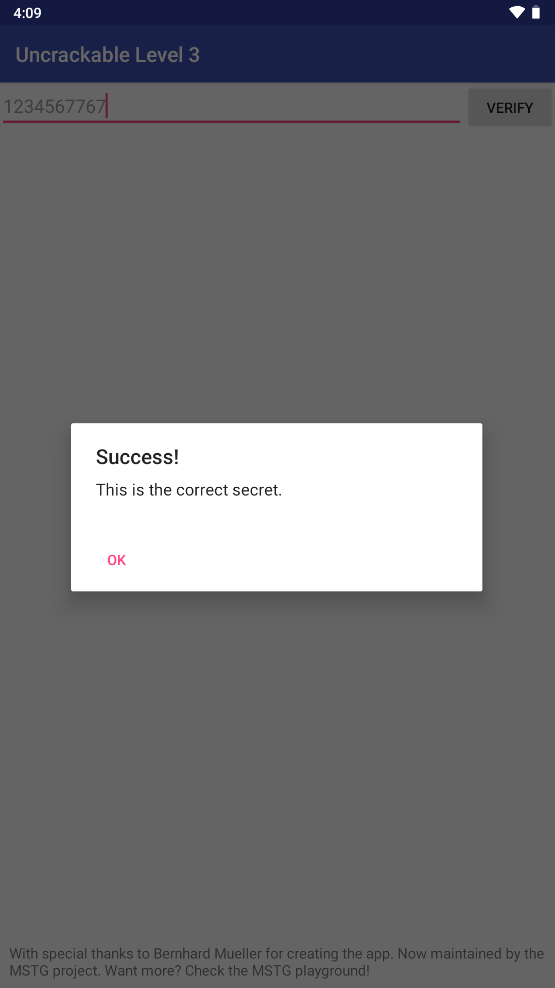
输入静态分析的key:
绕过secret检测逻辑 跟L2中的逻辑类似,只是要多一个frida检测的绕过
1 2 3 4 5 6 7 8 9 10 11 12 13 14 15 16 17 18 19 20 21 22 23 24 25 26 27 28 29 30 31 32 33 34 35 36 37 38 39 40 41 42 43 44 45 46 47 48 Java.perform(function (var func = Java.use('sg.vantagepoint.util.RootDetection' );function (return false ;function (return false ;function (return false ;function x (var func_addr = Module.findExportByName("libfoo.so" ,"Java_sg_vantagepoint_uncrackable3_CodeCheck_bar" );console .log (func_addr);function (args ) {console .log ("Hook start" );console .log ("args[2]=" + args[2 ]); onLeave : function (retval ){ console .log ("return original value:" +retval); replace (1 );1000 );var haystack = "" ;var needle = "" ;var frida = false ;"libc.so" , "strstr" ), {onEnter : function (args ) {0 ];1 ];Boolean (0 );if (haystack.indexOf ("frida" ) !== -1 || haystack.indexOf ("xposed" ) !== -1 ) {Boolean (1 );onLeave : function (retval ) {if (frida) {replace (0 );return retval;
结果:
动态获取异或的key(静态分析中的v9的值) 勾取sub_FA0的入参v9,打印出v9的值,上述分析的都是32位程序,因此sub_FA0的偏移地址是0xFA0,下面的代码是在64位系统中运行的,因此偏移量设置为64位lib的值0x12C0,可以根据实际情况调整add的偏移量
1 2 3 4 5 6 7 8 9 10 11 12 13 14 15 16 17 18 19 20 21 22 23 24 25 26 27 28 29 30 31 32 33 34 35 36 37 38 39 40 41 42 43 44 45 46 47 48 49 50 51 52 53 54 55 56 57 58 59 60 61 62 63 Java .perform (function (var func = Java .use ('sg.vantagepoint.util.RootDetection' );checkRoot1 .implementation = function (return false ;checkRoot2 .implementation = function (return false ;checkRoot3 .implementation = function (return false ;const System = Java .use ("java.lang.System" );const Runtime = Java .use ("java.lang.Runtime" );const SystemLoad _2 = System .loadLibrary .overload ("java.lang.String" );const VMStack = Java .use ("dalvik.system.VMStack" );SystemLoad _2.implementation = function (library ) {console .log ("Loading dynamic library => " + library);try {const loaded = Runtime .getRuntime ().loadLibrary0 ( VMStack .getCallingClassLoader (), library);if (library.includes ("foo" )) {Interceptor .attach (Module .findBaseAddress ("libfoo.so" ).add ('0x000012c0' ),{ onEnter : function (args ){console .log ("getting other_key value" );this .other_key_address = args[0 ];onLeave : function (retval ){var other_key = new NativePointer (this .other_key_address );var arr = other_key.readByteArray (24 );console .log (arr);return loaded;catch (ex) {console .log (ex);console .log (ex.stack );var haystack = "" ;var needle = "" ;var frida = false ;Interceptor .attach (Module .findExportByName ("libc.so" , "strstr" ), {onEnter : function (args ) {0 ];1 ];Boolean (0 );Memory .readUtf8String (haystack);Memory .readUtf8String (needle);if (haystack.indexOf ("frida" ) !== -1 || haystack.indexOf ("xposed" ) !== -1 ) {Boolean (1 );onLeave : function (retval ) {if (frida) {replace (0 );return retval;
结果与我们静态分析的结果一致:
1 2 3 4 5 [SM-N976N::owasp.mstg.uncrackable3 ]-> Loading dynamic library => foo
L4 暂时没分析出来,等后续水平提升了继续。分析了一下加载过程中的一些调用:
1 2 3 4 5 6 7 8 9 10 11 12 13 14 15 16 17 18 19 20 21 22 23 24 25 26 27 28 29 30 31 32 33 34 35 36 37 38 39 40 41 42 43 44 45 46 47 48 49 50 51 52 53 54 55 56 57 58 59 60 61 62 63 64 65 66 Java .perform (function (var func = Java .use ('b.a.a.b' );j .implementation = function (return false ;a .overload ().implementation = function (return true ;e .overload ().implementation = function (return false ;Interceptor .attach (Module .findExportByName ("libc.so" , "readlinkat" ), {onEnter : function (args ) {this .readlinkat_addr = args[1 ];this .readlinkat_buf = args[2 ];console .log ("readlinkat =>" + Memory .readUtf8String (args[1 ]))onLeave : function (retval ) {if (retval.toInt32 () == 14 ){this .readlinkat_buf .writeUtf8String ("anon_inode:[eventfd]" );replace (20 );console .log ("readlinkat buf modifyd: " +retval.toInt32 () +" :" + Memory .readUtf8String (this .readlinkat_buf ));return retval;Interceptor .attach (Module .findExportByName ("libc.so" , "open" ), {onEnter : function (args ) {console .log ("open =>" + Memory .readUtf8String (args[0 ]))onLeave : function (retval ) {console .log ("open ret=>" + retval.toInt32 ());return retval;Interceptor .attach (Module .findExportByName ("libc.so" , "openat" ), {onEnter : function (args ) {console .log ("openat =>" + Memory .readUtf8String (args[0 ]))onLeave : function (retval ) {console .log ("openat ret=>" + retval.toInt32 ());return retval;Interceptor .attach (Module .findExportByName ("libc.so" , "faccessat" ), {onEnter : function (args ) {this .faccessat = args[1 ];onLeave : function (retval ) {console .log ("faccessat =>" + Memory .readUtf8String (this .faccessat ))return retval;Interceptor .attach (Module .findExportByName ("libc.so" , "snprintf" ), {onEnter : function (args ) {this .snprintf_addr = args[0 ];onLeave : function (retval ) {console .log ("snprintf =>" + Memory .readUtf8String (this .snprintf_addr ));Memory .writeUtf8String (this .snprintf_addr , "/proc/self/task/123/status" );console .log ("snprintf modified =>" + Memory .readUtf8String (this .snprintf_addr ));return retval;